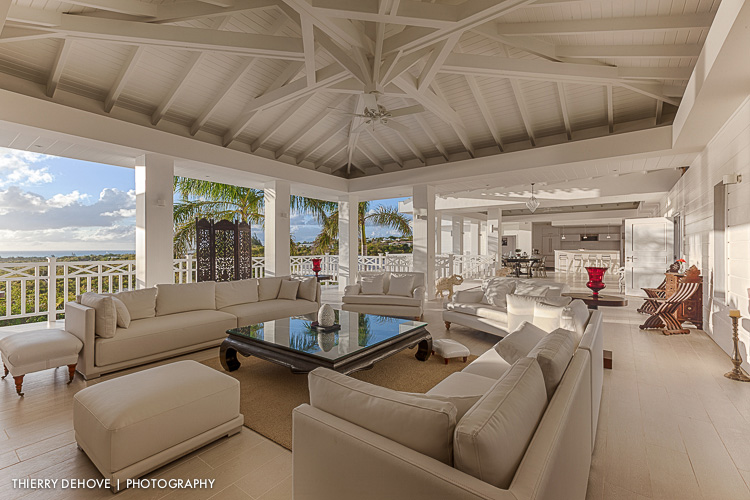
High Dynamic Range photography tutorials with Nik Collection HDR Efex Pro 2
I have explained High Dynamic Range with this tutorial, to read it, click here
With this tutorial, I would like to share my workflow wiht you: How to create a High Dynamic Range photography with Nik Collection HDR Efex Pro 2. For my French fellows, I have a Google Webinar did last January where during one hour I shared all the process in “Live”. Click here to see it
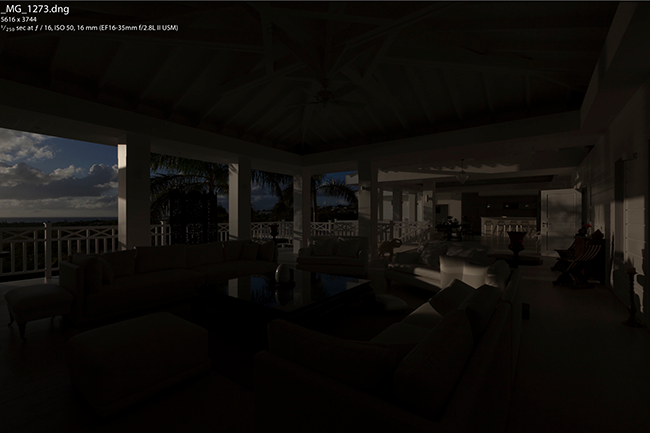
Image 01
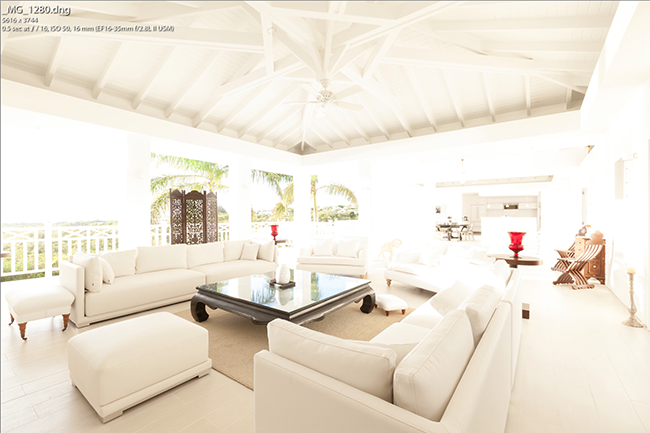
Image 02
As you can see from my first exposure 01 (image 01), I get all the details from outside and same thing with my last one (image 02) I capture all the highlights from my scene.
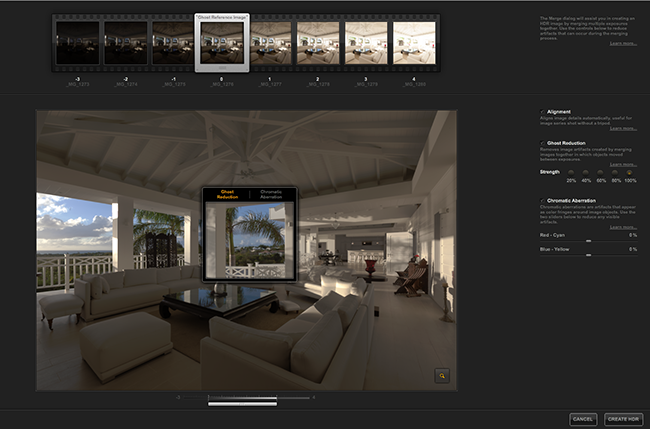
Image 03
From Lightroom, I select all my 8 images and click right to Export to find HDR Efex Pro 2, Nik process all the images, after few minutes, you get this interface with many options before to build your HDR. At the top, all my image series, very helpful when you want to select the right base to remove Ghost. I am sure you get this artifacts effects when you are shooting trees, waves or even people walking, with this slider you can determine which “movement” you wish to keep to build your HDR. image 03
Alignment checkbox is perfect if you are capturing without tripod and I am doing a lot of HDR with only 3 exposures to make sure I always options when I am editing my images
Ghost Reduction Checkbox is the only option I play for each of my HDR. For some of images, I notice that it’s better to remove them this option or reduce the strength. some artifacts can appear sometimes in the corner on the wall if you are doing architecture photography. For this image, I keep it check and optimize my Ghost with the palmtress. I like to use the Loupe Tool to select my base image for my Ghost Reduction. In this case, the middle is perfect but I unchecked the Ghost Reduction. Click Create HDR.
Next window is the real interface of HDR Efex Pro 2 with your Preset Library on your left. This library provide you many difference styles. My advise is start with one you like and built your own preset, you save it and it will appear after at the bottom into Custom. On your right hand side, bunch of sliders as Tone Compression, Tonality, Color, Selective Adjustments and Finishing.
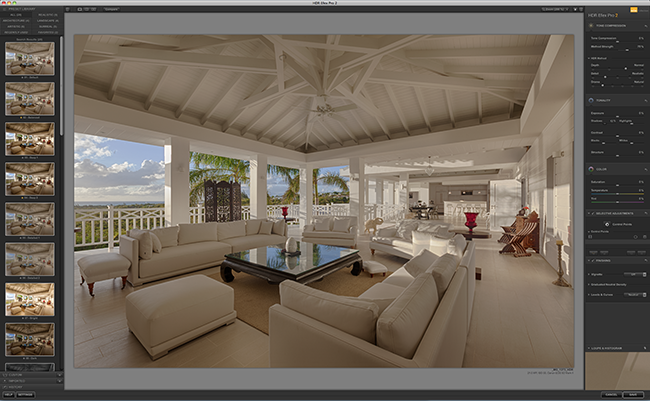
High Dynamic Range photography tutorials with Nik Collection HDR Efex Pro 2: Image 04
Personally, I am starting with the default preset from HDR Efex Pro 2, I increase the Method Strength by 70% (in general it is a great starting point so that you can see the affects of the other tools and you have to start by somewhere ;)) and push shadow between 10/20% into Tonality. I prefer to do these 2 adjustments now instead in Lightroom, I noticed I get less noise in shadow doing into HDR Efex. Once again, my advise is do your own tests and compare, those settings are my workflow and please me. Do not forget to use the Split Preview or Side-by-Side Preview to control the final result of your image edited. (image 04)

Image 05
The final and last part is to place some Control Points. Those controls are base on the same sliders you have on the right hand side. Control Points enables you to fine-tune my image with precise selective enhancements and much better than layer mask into Photoshop ;). With my image, I want to bring more details, structure, contrast and colors to my outside view, as you can see with my image 05
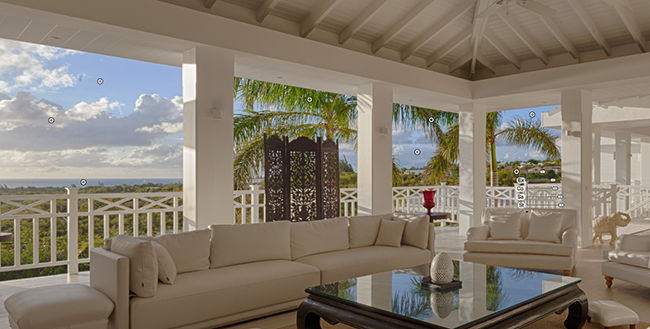
Image 06
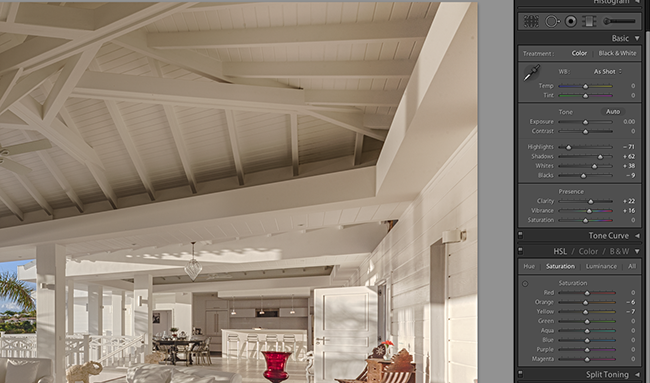
High Dynamic Range photography tutorials with Nik Collection HDR Efex Pro 2: Image 07
I copy this same Points in different spots as you can on image 06. Et voila, after click save on HDR Efex Pro 2, my new TIFF image appear close to my source images. With the Develop module inside Lightroom, I am working on my Highlights, Shadows, Whites and Black. With Presence, some Clarity and Vibrance, remove your yellow cast with the saturation as you can the numbers with image 07.
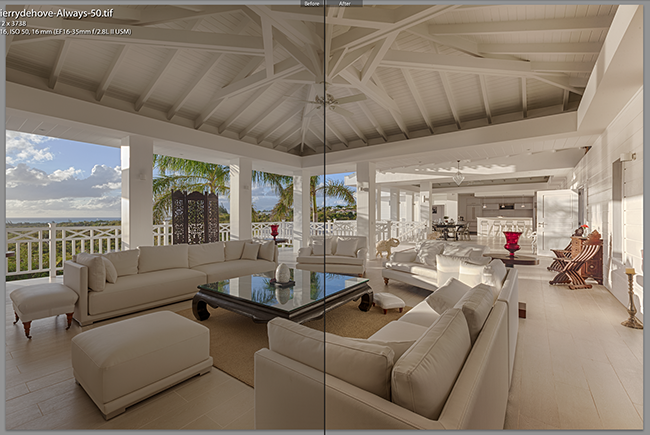
Image 08
On image 08, we can see the difference I did with Lightroom. Setting camera to Manual (M): 8 Exposures at F/16, ISO 50 from 1/250 to 0.5 sec. (1 stop each time)
Edited with Adobe Photoshop Lightroom and HDR Efex Pro 2
To read more tutorials with Nik Collection, click here
Enjoy them. Posted June 2013
© Thierry Dehove Photography. All rights reserved. These images, or derivative works, can not be used, published, distributed or sold without written permission of the owner.
